Creating your first workout
Start mastering the essentials of Neon Swim by building your first custom workout. Simple tools, powerful results—this is where your coaching efficiency begins.
Getting Started with Neon Swim
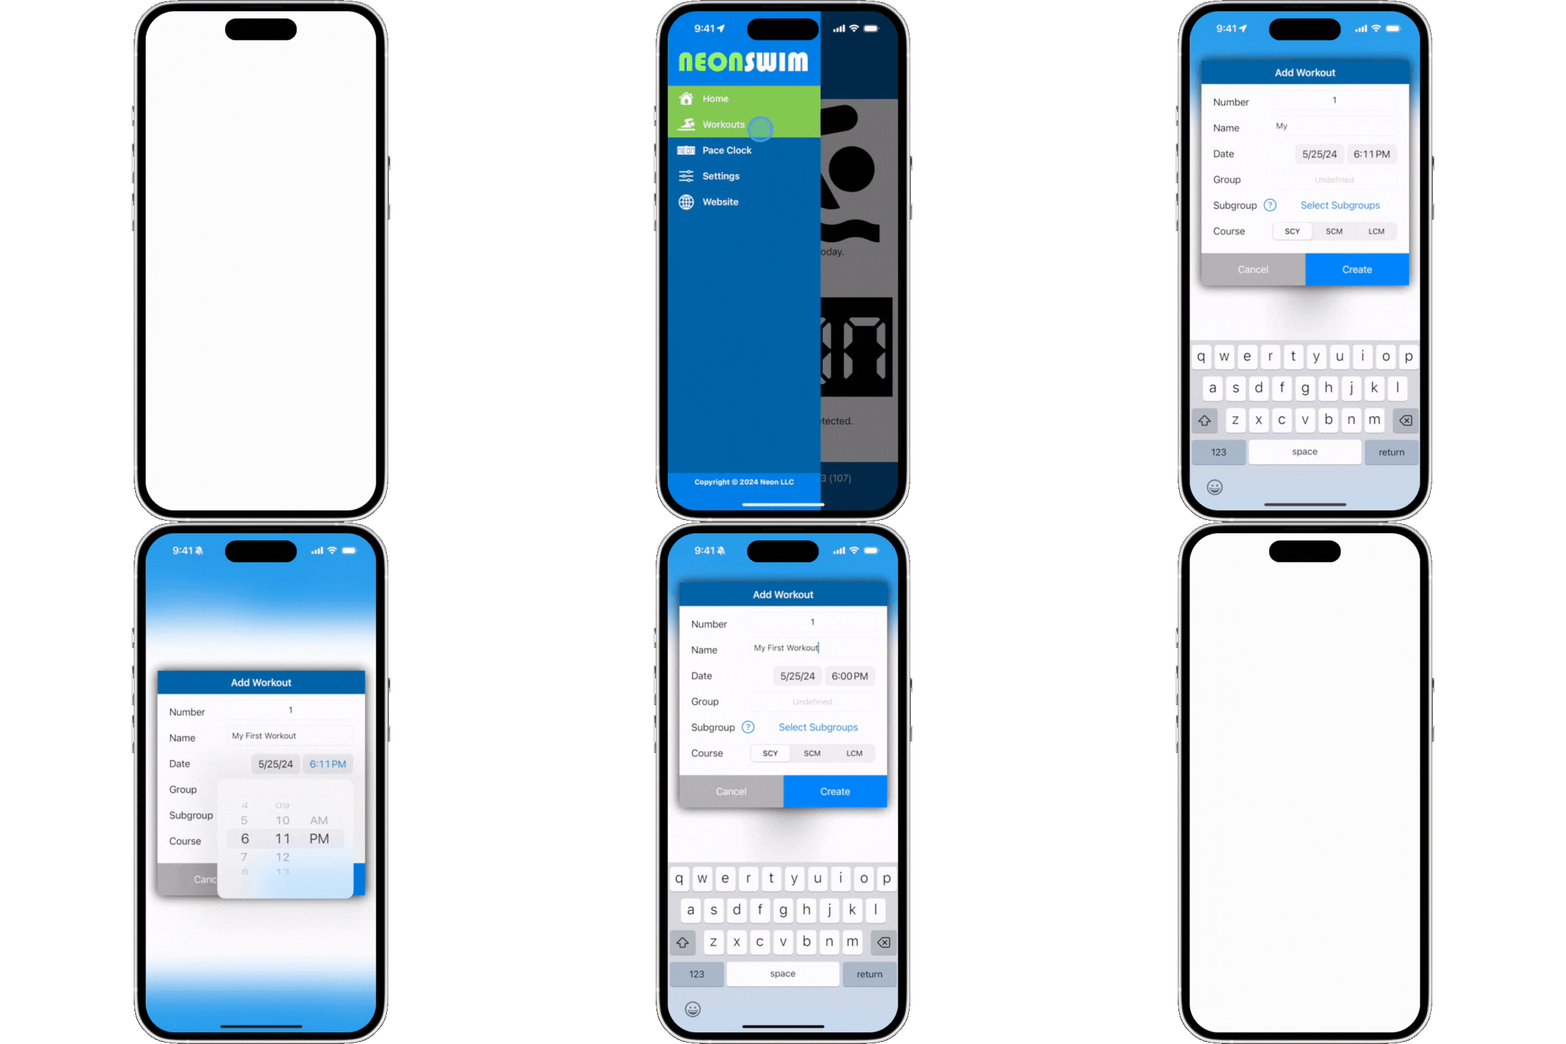
Welcome to Neon Swim! To begin, you’ll first see the home screen. Here, you can check the day’s scheduled workouts and detect any nearby Neon Pace Clocks. Let’s start by creating your very first workout.
Creating Your First Workout
From the home screen, tap the Menu button (located in the top left) or swipe from the left side of the screen. Then, tap the plus (+) button in the upper right to create a new workout. Now, let’s name your workout and set the date. For now, we’ll leave the group and subgroup fields blank—they’ll be covered in a later video.
Adding Your First Set
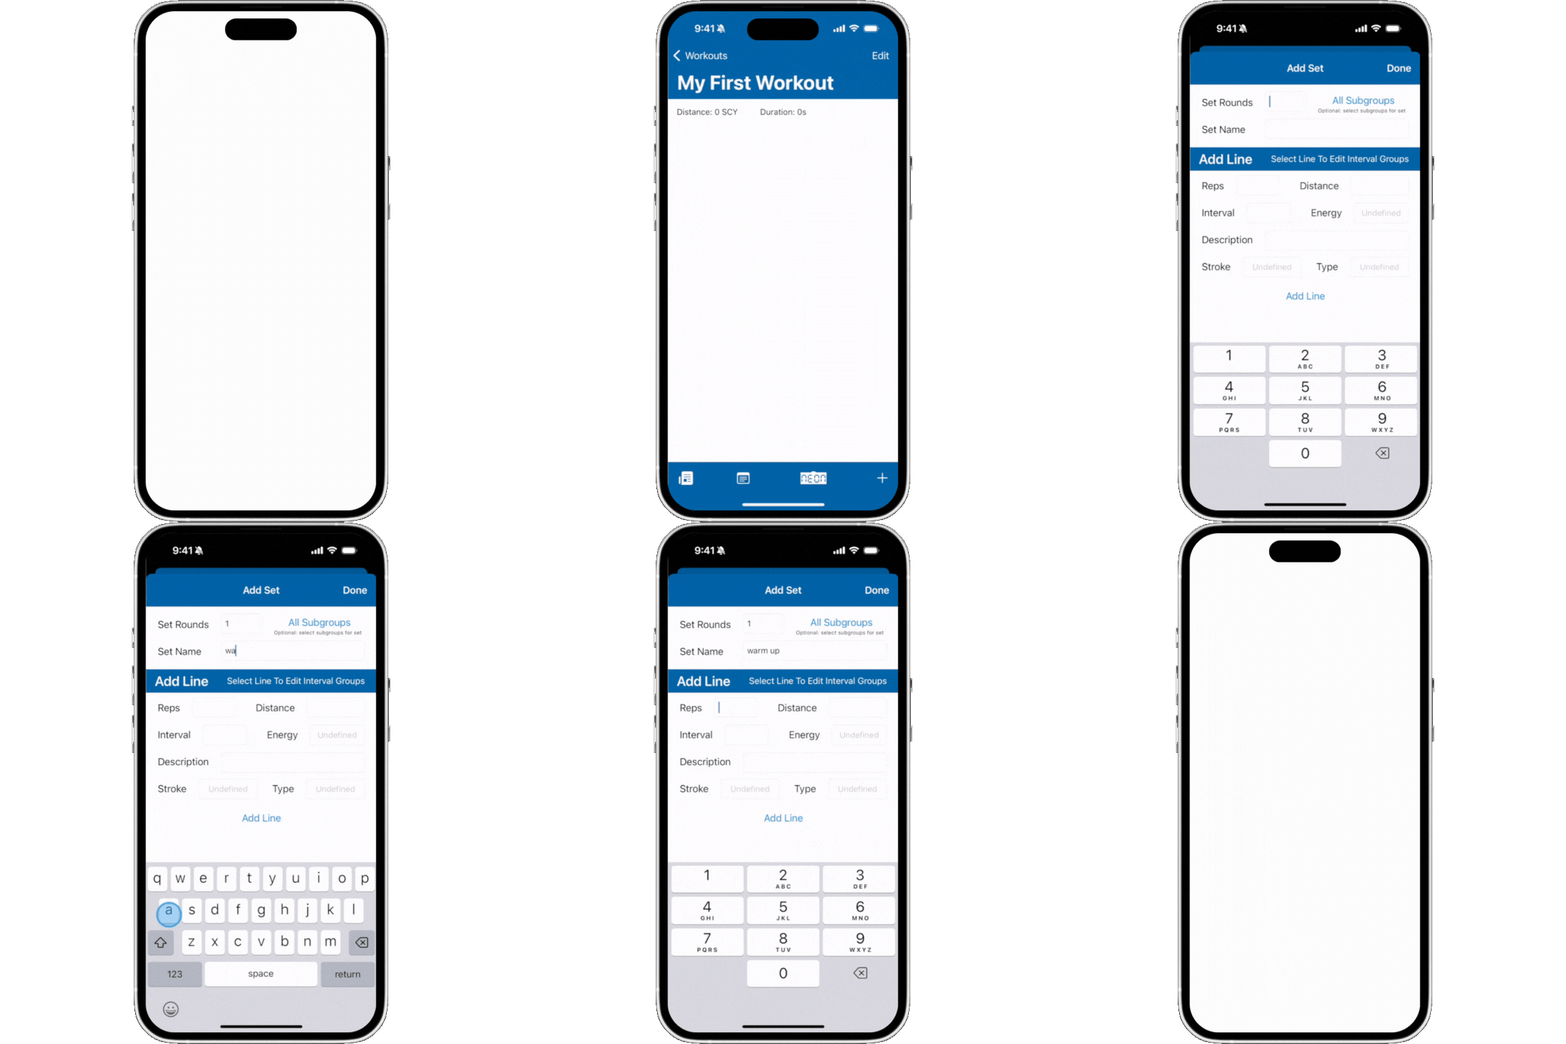
Now that the workout is created, it’s time to add your first set. Tap on the workout you just created, then tap the plus (+) button at the bottom right of the screen. Here, you can add a set by specifying the number of rounds and giving the set a name. This set will be the foundation of your workout!
Adding Details to Your Set
Once the set is created, it’s time to add specific details. You can now include the number of reps, intervals, distance, and even more options like energy systems, stroke type, and the style of swimming (such as freestyle, backstroke, etc.). This will help personalize each set for your swimmers.
Modifying and Editing Your Workout
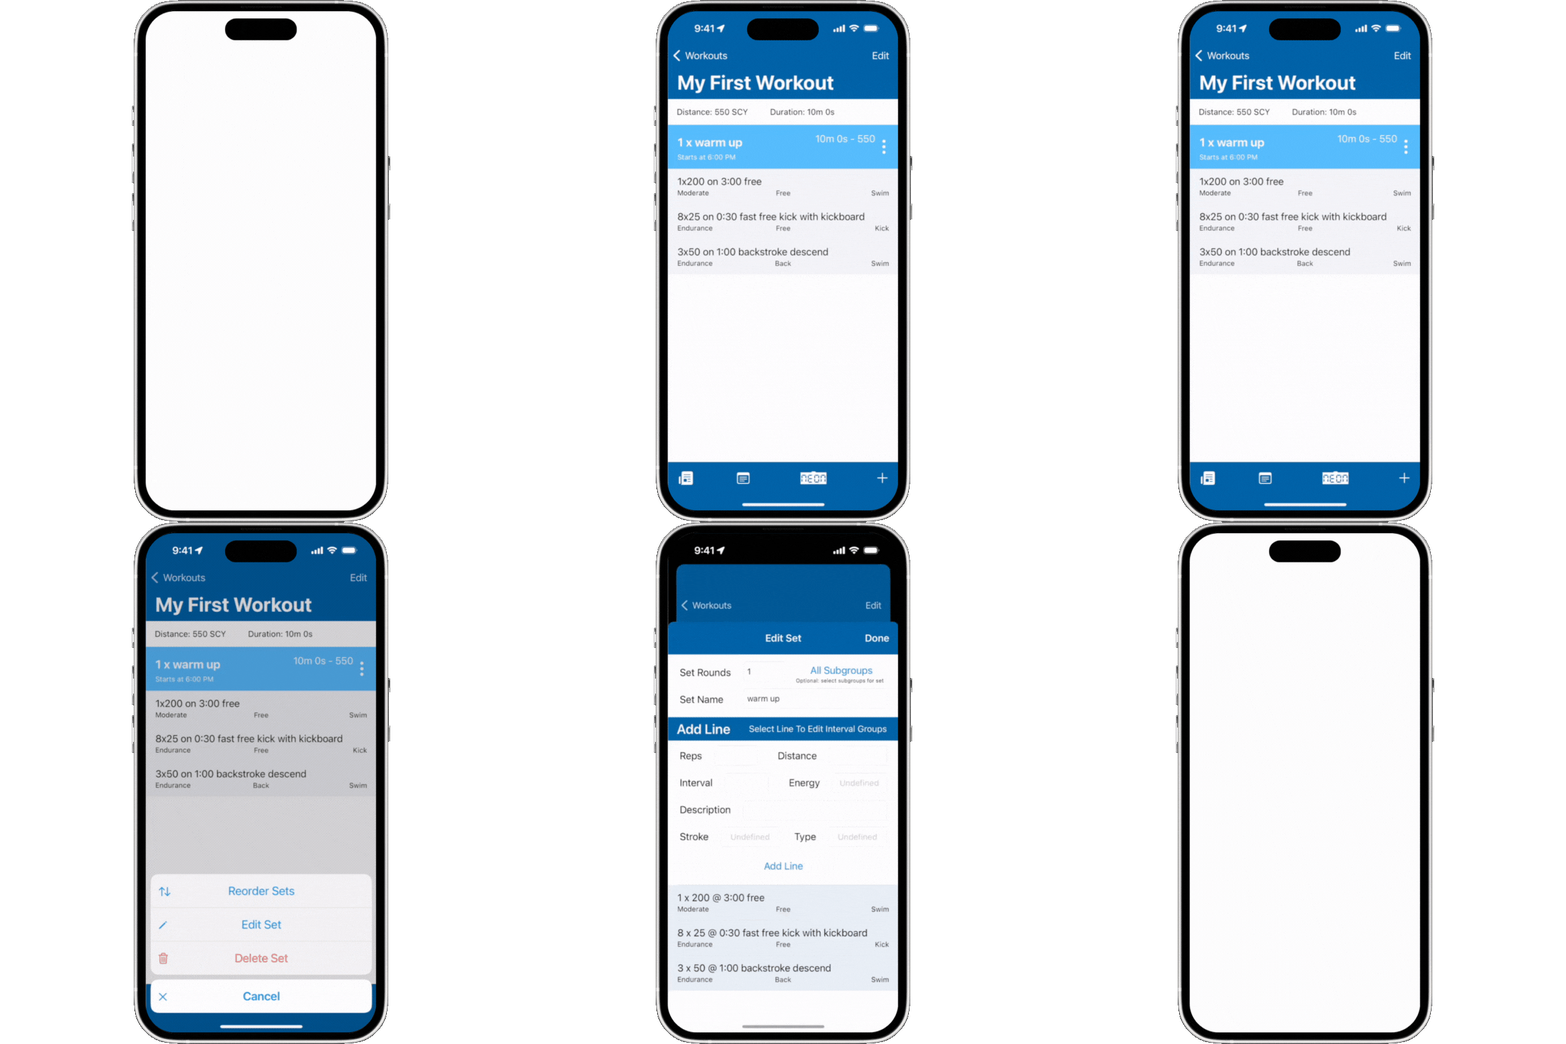
If you ever need to change a set, no worries! Just tap the options (⋮) button next to the set you want to edit. You’ll be able to modify everything you’ve already created, from the number of reps to the interval times.
Viewing and Sharing Your Workout
Once your workout is ready, you can easily view it in a PDF format. Tap the button in the bottom left to see the full workout. From here, you can print it or send it via email—whichever works best for you and your team.


